Kubernetes provides a framework to orchestrate multiple containers, verses working with one container at a time. To practice managing containers I opted to build a Kubernetes cluster on Raspberry Pis using Rancher. Rancher came about soon after Docker introduced containers to the market, and provides an open-source platform for enterprises to easily use Kubernetes in their environment.
K3S is a Rancher product that allows you to deploy a Kubernetes cluster using a single binary file thats less than 40MB. K3S is ideal for Raspberry Pis, since traditionally building a Kubernetes cluster on Pis could be too much for them to handle. In addition to K3S this is what I used to build a simple Kubernetes cluster in my home lab:
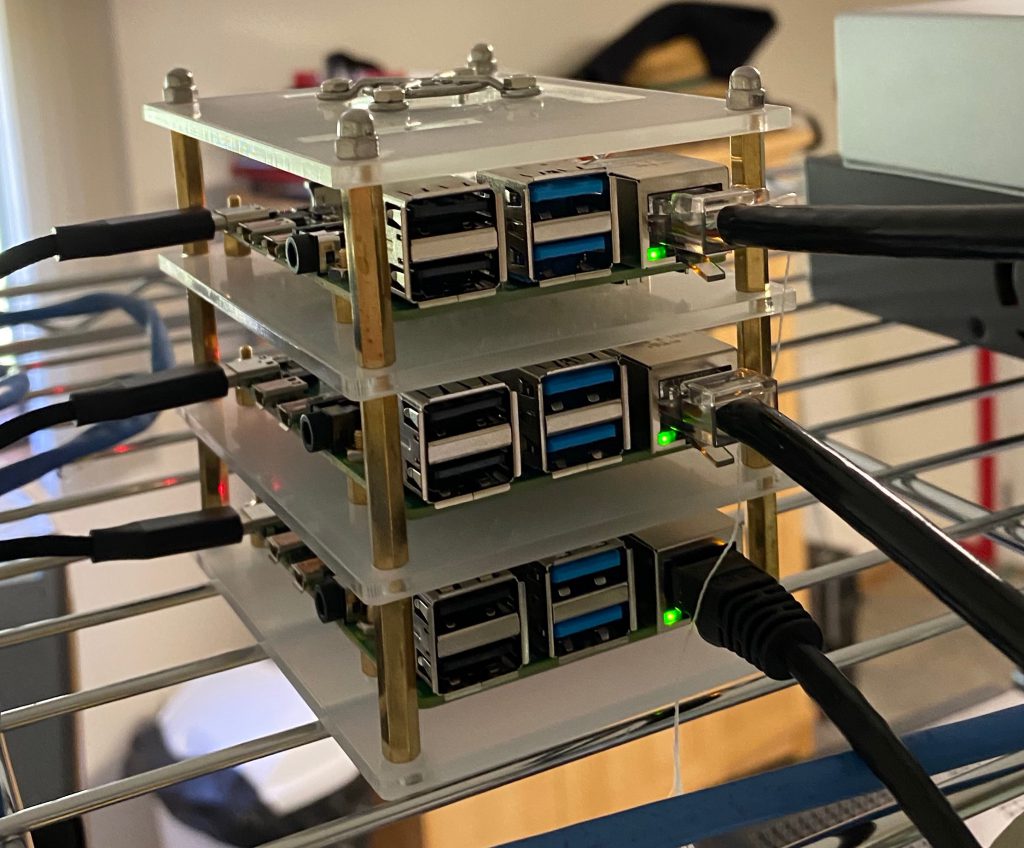
- 3 Raspberry Pi 4s
- GeekPi Raspberry Pi Cluster Case w/Heat Sinks and Fans
- 3 power cables and a power supply
- 3 patch cables and a switch connected to a DNS & router
- 3 miniSD cards and a CanaKit MicroSD USB Reader
A Kubernetes cluster runs by placing containers into groups called pods that run on nodes. A node can be a virtual or physical machine. Each cluster has a master node and at least one worker node that it reports to it. I had 3 Pis to use, so in my cluster I built one master node and two worker nodes. kubectl is the Kubernetes command-line tool that you can use to run commands against a cluster. When building this cluster I used a few kubectl commands to check my progress, but they can be used for a lot more.
STEP 1: Build case (optional)
I got a case, which is basically a rack, to safely store the 3 Pis for the cluster. The first step was building the case, which consisted of screwing each Raspberry Pi to a base and stacking them one on top of the other. In between each Pi was a fan connected to the Pi below it to provide air flow, and I made sure to place heat sinks on the CPU, RAM and LAN of each Pi. The cooling equipment is probably unnecessary for this small project, but it will be good to have for a more CPU intense project in the future.

STEP 2: Set up the Raspberry Pis
Next, each Pi will need an SD card with an OS on it. They’ll also need to be connected to the internet with a static IP and have SSH abilities. You can go about this any way you want, but I chose to install Raspberry Pi OS 64 bit, a beta version of the new Pi OS, and configure the Pis to be headless.
I used a laptop running Linux Mint to put the OSs onto the SD cards. This involved downloading the OS and the app image of balenaEtcher onto the laptop and then putting the little SD cards in a USB with a MicroSD card adapter. Once plugged into the laptop, I used balenaEtcher to flash Raspberry Pi OS (64 bit) onto each card.

Once done I configured the SD cards so that the Pis would be headless (automatically boot with SSH ability and an IP).
After the SD cards are in the Pis, plug each Pi into a power supply and connected each one to the switch using patch cables.
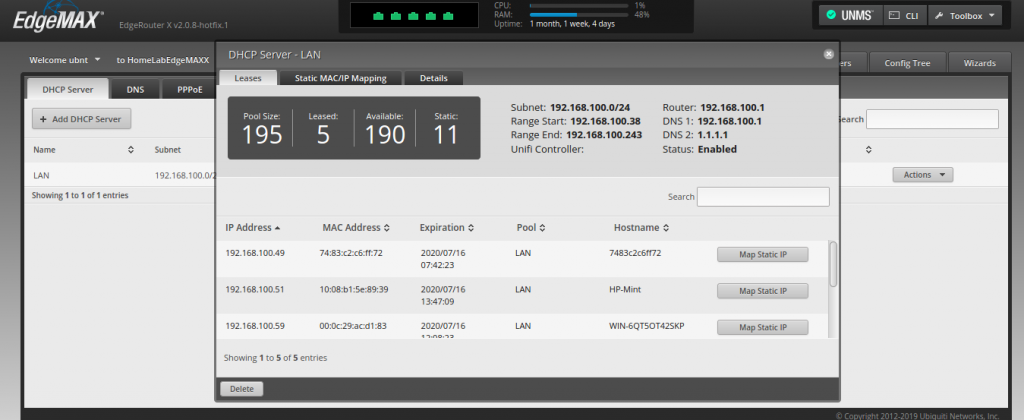
Since I configured the Pis to be headless, I checked the leased IPs on the router in the lab to find the IPs of each Pi and set that IP to be static.
STEP 3: Change hostnames (optional)
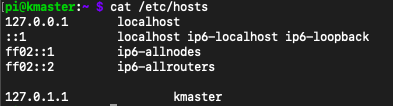
Building a Kubernetes cluster on Raspberry Pis involves a lot of SSH-ing, so to make it easier you can rename each Pi. I used the same names I gave each Pi on the router (kmaster, knode1, and knode2). On my PC (a MacBook) I ran sudo nano /etc/host to enter the hosts file. In the file I added three new lines, each containing the IP of a node and its friendly name.
I then SSH-ed into each Pi one by one and changed its name in the hostname file by running sudo nano /etc/hostname.
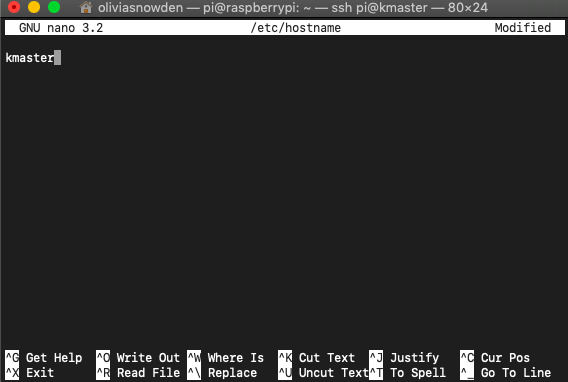
I then entered the /etc/host file like before to remove any instance of the old hostname and replace it with the new one.
Once those files are edited, reboot the Pis.
STEP 4: Create the master node
SSH into the Pi you designated to be the master node.
First, enter the /boot/cmdline.txt file to edit it (sudo nano /boot/cmdline.txt). At the end of the line in the file, add cgroup_enable=cpuset cgroup_memory=1 cgroup_enable=memory . Save the file and reboot.
To install K3S on the master node, run the following command which uses curl to download K3S from its website:
<code>curl -sfL <a href="http://get.k3s.io/">http://get.k3s.io</a> | sh -</code>
To make sure the K3S installed correctly, and to check its status, use:
sudo systemctl status k3s
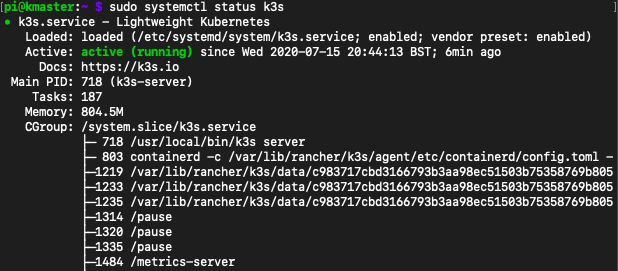
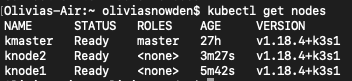
You should see that you have the k3s service running on your Pi. To check your nodes, run:
sudo k3s kubectl get nodes
At this point, you should only see your master node up and running.

To add agent, or worker, nodes to your master node you need the token the master node generates. To get it:
sudo cat /var/lib/rancher/k3s/server/node-token
Copy the token and save it for later.
STEP 5: Create agent nodes
To create a worker node, SSH into the Raspberry Pi and run:
curl -sfL http://get.k3s.io | K3S_URL=https://_your_master_node_IP_:643 K3S_TOKEN=_token_ sh -
There are a few variations of commands to set up a worker node using K3S, the one listed above instals K3S and then passes along the IP/Port of the master node and its token so that the workers know who to report to.
Repeat the above command for each Pi designated to be a worker node.
STEP 6: Install K3S on PC
It can be inconvenient to SSH into the Kubernetes master node to work on your cluster. You can install K3S onto your PC by first logging on to the master node and copying the configuration file found by running sudo cat /etc/rancher/k3s/k3s.yaml .
On your PC, make a directory for the config file ( mkdir ~/.kube) and paste the file into it. Before saving, change the “https://localhost:6443” line in the file to “https://kmaster:6443”.
Then install kubectl on your PC, simple instructions for your PC’s OS can be found here.
Finally, run kubectl get nodes on your PC to see the kubernetes cluster you have created.